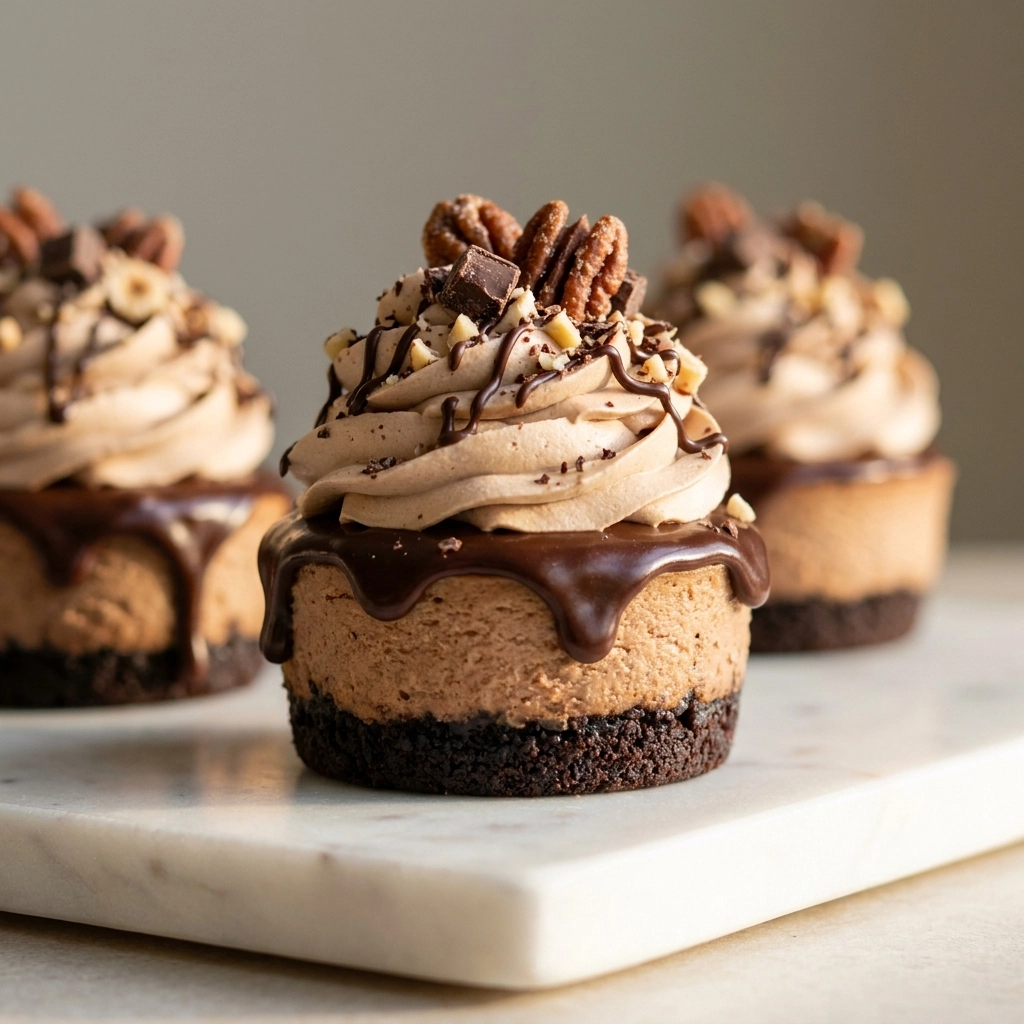
Stop searching for the ultimate hazelnut treat because this is the only recipe you will ever need!
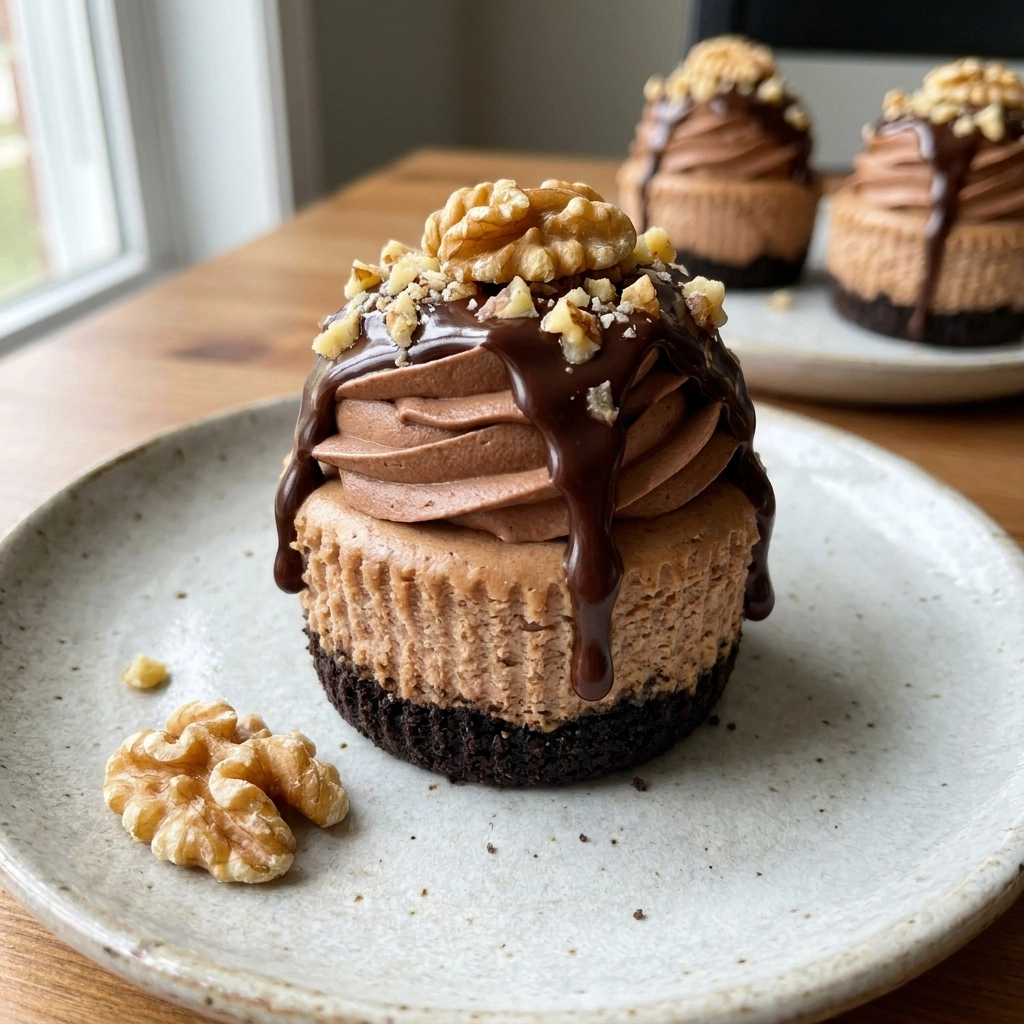
Imagine a moist, chocolatey base topped with a swirl of creamy, nutty cheesecake. It is a total flavor explosion that hits every single craving!
People absolutely adore these because they combine two legendary desserts into one portable handheld treat. It is luxury in a cupcake liner!
What makes this version stand out is the specific balance of salt and hazelnut that cuts through the richness. It is not just sweet; it is complex!
Forget those bland, store-bought versions that taste like processed sugar. These are homemade, rich, and possess a depth of flavor that commercial bakeries cannot touch.
This is the go-to choice for anyone who wants to impress guests without spending all day in the kitchen. If you love bold flavors, try our Indulge In Red Velvet Cheesecake Cupcakes Best Recipe
Let’s dive into the details and get these treats in your oven!
- ●Why You’ll Love This Recipe
- ●A Brief Background / Why This Recipe Works
- ●Perfect For Sweet Celebrations and Parties
- ●Main Ingredient Spotlight: Nutella
- ●Secondary Ingredient Spotlight: Cream Cheese
- ●Key Ingredients
- ●How to Make It
- ●Pro Tips
- ●Delicious Variations
- ●Best Ways to Serve
- ●Storage and Leftovers
- ●Frequently Asked Questions
- ●Why This Recipe Belongs in Your Weekly Rotation
- ●Final Thoughts
There are a million reasons to whip these up, but the sheer joy of that first bite is the biggest one!
- ●The contrast between the fluffy cake and dense cheesecake is striking.
- ●Nutella provides a signature hazelnut punch that is instantly recognizable.
- ●They look professional and gourmet with very little effort.
- ●The chocolate base remains moist for days.
- ●You can customize the swirl pattern for a beautiful visual effect.
- ●They satisfy both chocolate lovers and cheesecake fanatics.
- ●The portion size is just right for parties.
- ●The scent filling your home while they bake is intoxicating.
- ●They pair flawlessly with a cold glass of milk or hot coffee.
Once you see the look on your family’s faces, you will be making these every single month!
A Brief Background / Why This Recipe Works |
For a long time, I struggled to get the cheesecake center to stay put. I almost gave up on this recipe until I realized that the temperature of the cream cheese was the secret culprit!
The science here relies on the emulsion of fats. cream cheese is truly room temperature, it blends seamlessly with the Nutella, preventing the dreaded “lumpy” texture that ruins so many homemade cheesecake attempts.
But here’s the thing: the chocolate cake base acts as a structural anchor. It provides enough stability to hold the heavy cheesecake filling without collapsing during the baking process.
That’s exactly why we use a specific ratio of cocoa powder to flour. It ensures the cake is sturdy yet tender, creating the ideal foundation for the creamy topping. For a different twist, try No Bake Oreo Nutella Cheesecake Pure Chocolatey Bliss
Ultimately, the marriage of salt, fat, and cocoa creates a balanced profile that keeps you coming back for more.
Perfect For Sweet Celebrations and Parties |
These are a smash hit for birthdays or anniversary celebrations where you want a “wow” factor. They feel far more special than a standard cupcake, making the occasion feel elevated.
If you are planning a holiday spread, these fit right in. They are rich enough to be a standalone dessert but small enough to be part of a larger platter of sweets.
For those who enjoy meal prepping their treats, these are fantastic. You can bake a big batch on Sunday and have a high-end snack ready for the entire work week.
They are even a winner for school bake sales or office potlucks because they are easy to transport and don’t require a fork to eat.
Main Ingredient Spotlight: Nutella |
Nutella is the star of the show here, providing both the sweetness and the nutty depth. Its unique consistency allows it to act as both a flavoring and a thickening agent in the cheesecake swirl.
The roasted hazelnut profile cuts through the heaviness of the cream cheese, while the cocoa notes bridge the gap between the topping and the cake base. It is the glue that holds the flavor profile together.
Secondary Ingredient Spotlight: Cream Cheese |
Cream cheese provides the essential tang that prevents the cupcakes from being overly sweet. It adds a velvety smoothness that creates that classic cheesecake mouthfeel.
When whipped correctly, it incorporates air that lightens the texture, ensuring the cupcakes don’t feel like a brick of sugar. It is the crucial counterpoint to the rich chocolate.
Key Ingredients |
Gather these essentials to ensure your baking session goes smoothly!
- ●All-purpose flour — The structural foundation of the cupcake.
- ●Cocoa powder — Provides the deep, dark chocolate essence.
- ●Baking powder — Lifts the cake for a fluffy texture.
- ●Granulated sugar — Sweetens the base and tenderizes the crumb.
- ●Unsalted butter — Adds moisture and a rich, buttery flavor.
- ●Eggs — Binds the ingredients and provides lift.
- ●Milk — Ensures the batter is smooth and pourable.
- ●Cream cheese — The creamy, tangy heart of the cheesecake.
- ●Nutella — The iconic hazelnut spread for flavor and color.
- ●Vanilla extract — Enhances all the other flavors in the mix.
 How to Make It |
Get your apron on! We are going to combine precision with passion to create these treats.
- Prep the Oven and Pan: Preheat your oven to 350°F (175°C) and line a cupcake tin with liners. Ensuring the oven is fully heated is vital because the cake needs an immediate burst of heat to rise correctly; if the oven is too cool, your cupcakes will be dense.
- Cream the Butter and Sugar: Beat the softened butter and sugar together until the mixture looks pale and fluffy. You want to see a light, airy texture which indicates that air has been whipped into the fat, preventing the cake from becoming too heavy.
- Mix in Wet Ingredients: Add the eggs one at a time, followed extract, beating well after each addition. Avoid over-mixing at this stage, as too much agitation can develop the gluten in the flour later, leading to a tough, bread-like texture.
- Sift and Fold Dry Ingredients: Gently fold in the flour, cocoa powder, and baking powder, alternating with the milk. Look for a smooth, glossy batter with no lumps of flour; the goal is a uniform consistency that flows easily but isn’t runny.
- Prepare the Nutella Filling: In a separate bowl, whip the room-temperature cream cheese until smooth, then beat in the Nutella. The mixture should be a consistent caramel-brown color and hold a soft peak; if it looks curdled, your cream cheese was likely too cold.
- Layer the Batter: Fill each cupcake liner about one-third of the way with chocolate batter, then dollop a spoonful of the Nutella mixture on top. Once the filling is in place, add another small layer of cake batter to cover the cheesecake. If you love different textures, try Carrot Cheesecake Cupcakes The Ultimate Spring Dessert Hybrid
- Create the Swirl: Use a toothpick or a small knife to gently swirl the cheesecake into the cake batter. Do not over-swirl, or you will lose the distinct layers and end up with a muddy color; a few figure-eight motions are all you need.
- Bake to Perfection: Bake for 20 to 22 minutes. The cakes are done when a toothpick inserted into the cake part comes out clean, while the cheesecake center remains slightly jiggly; over-baking will cause the cheesecake to crack and dry out.
- Cool and Set: Let the cupcakes cool in the pan for 10 minutes before transferring them to a wire rack. This resting period allows the internal structure to set, ensuring the cheesecake layer doesn’t collapse when you move them.
1Small changes make a huge difference in the final result!
- ●2Room Temperature is King: Ensure both your eggs and cream cheese are truly room temperature to avoid a broken batter.
- ●3Sift Your Cocoa: Cocoa powder is notorious for clumps; sifting it ensures a smooth cake without bitter pockets of powder.
- ●4Don’t Overfill: Leave about a quarter-inch of space at the top of the liner to prevent the cheesecake from overflowing.
- ●5Use Quality Cocoa: A Dutch-processed cocoa powder provides a darker color and a smoother taste.
- ●6Chill Before Frosting: If you decide to add frosting, wait until the cupcakes are completely cold to prevent the icing from melting. If you enjoy fruity pairings, check out Delectable Chocolate Raspberry Cupcakes Recipe
Delicious Variations |
Feel free to experiment with these twists to make the recipe your own!
- ●Sea Salt Topping: Sprinkle a pinch of flaky sea salt on top before baking to balance the sweetness.
- ●White Chocolate Drizzle: Melt white chocolate and drizzle it over the cooled cupcakes for a visual pop.
- ●Hazelnut Crunch: Press a toasted hazelnut into the center of the swirl before baking.
- ●Coffee Infusion: Add a teaspoon of espresso powder to the chocolate batter for a mocha-inspired treat.
- ●Cream Cheese Frosting: Top with a swirl of vanilla bean cream cheese frosting for extra decadence.
No matter which version you choose, the core combination of hazelnut and chocolate remains a winner.
Best Ways to Serve |
Presentation is everything when serving these gourmet treats!
- ●The Dessert Platter: Arrange them on a slate board with fresh raspberries and mint leaves.
- ●The Coffee Break: Serve warm with a cappuccino to let the chocolate melt slightly.
- ●The Party Tower: Stack them on a tiered cake stand for a professional look.
For a more formal event, place each cupcake in a decorative paper wrapper. This adds a layer of sophistication and makes them easier for guests to handle.
Pairing these with a tart beverage, like a chilled glass of sparkling raspberry water, cleanses the palate between bites. For a breakfast version of cheesecake treats, look at Fluffy Strawberry Cheesecake Pancakes Recipe
Storage and Leftovers |
Refrigerating
Store these in an airtight container in the fridge for up to 5 days. Because of the cream cheese, refrigeration is mandatory to keep them safe and fresh.
Reheating
To enjoy them warm, pop a cupcake in the microwave for 8 to 10 seconds. Be careful not to over-heat, or the cheesecake center will become too liquid.
Freezing
Wrap each cupcake individually in plastic wrap and place them in a freezer bag for up to 3 months. Thaw them slowly in the fridge overnight before eating.
Frequently Asked Questions |
- ●Q: Can I use a different hazelnut spread?A: Yes, you can use any high-quality hazelnut spread, but ensure the consistency is similar to Nutella. If the spread is too runny, your cheesecake swirl might sink to the bottom of the cupcake and not create that beautiful marbled effect.
- ●Q: Why did my cheesecake layer crack during baking?A: Cracking usually happens due to over-baking or the oven being too hot. The cream cheese expands and then contracts quickly, causing the surface to split. Try reducing your oven temperature by 10 degrees next time.
- ●Q: Can I make these gluten-free?A: Absolutely! Substitute the all-purpose flour with a high-quality 1:1 gluten-free baking blend. Make sure the blend contains xanthan gum to ensure the cupcakes maintain their structure and don’t crumble when you take them out of the liner.
- ●Q: My batter looks curdled; what happened?A: This typically happens when cold eggs or cold milk are added to creamed butter. The fat separates from the liquid. You can usually fix this the bowl over a pot of simmering water for a few seconds.
- ●Q: Can I freeze the batter before baking?A: It is not recommended to freeze the batter as the leavening agents like baking powder will lose their potency. It is much better to bake them fully and then freeze the finished cupcakes for later use.
- ●Q: How do I get the perfect swirl every time?A: The trick is to avoid over-mixing. Use a toothpick to create 2 or 3 loops in the filling. If you stir too much, the chocolate and cheesecake blend entirely, and you lose the distinct visual contrast.
Why This Recipe Belongs in Your Weekly Rotation |
Having a reliable, high-impact dessert in your repertoire is a game-changer for any home cook. These cupcakes provide a level of indulgence that usually requires a trip to a fancy bakery, but they are achievable in your own kitchen.
They are versatile enough for a casual Tuesday night treat or a grand holiday celebration. The combination of ingredients is simple, yet the result feels sophisticated and curated.
Moreover, the joy of baking these is half the fun. From the smell of cocoa to the visual satisfaction of the swirl, it is a therapeutic process that ends in a rewarding treat. If you are preparing for the holidays, try Festive Tempting Santa Hat Cupcakes For Holiday Cheer
Stop settling for basic desserts and start treating yourself to the luxury you deserve every single week!
Final Thoughts |
These cupcakes combine a rich chocolate base with a creamy, Nutella-infused cheesecake center for a treat that is balanced and bold. Every bite delivers a blend of nutty, tangy, and sweet notes that satisfy every craving.
You should make these because they bring a touch of gourmet elegance to your table without requiring professional skills. They are a guaranteed crowd-pleaser that will leave your friends and family asking for the recipe.
Go grab your whisk and turn your kitchen into a chocolate paradise today!
Nutella Cheesecake Cupcakes
- Total Time: 42 minutes
- Yield: 12 cupcakes 1x
Description
Rich chocolate cupcakes filled with a creamy Nutella-infused cheesecake swirl for a decadent dessert experience.
Ingredients
- 1 1/2 cups all-purpose flour
- 1/2 cup cocoa powder
- 1 tsp baking powder
- 1 cup granulated sugar
- 1/2 cup unsalted butter, softened
- 2 large eggs
- 1 tsp vanilla extract
- 1/2 cup milk
- 8 oz cream cheese, softened
- 1/2 cup Nutella
Instructions
- Preheat oven to 350F (175C) and line a cupcake tin.
- Cream butter and sugar until fluffy.
- Beat in eggs and vanilla extract one at a time.
- Sift together flour, cocoa, and baking powder; fold into wet ingredients alternating with milk.
- Beat softened cream cheese and Nutella until smooth.
- Fill cupcake liners 1/3 full with cake batter, add a dollop of Nutella mixture, and top with more batter.
- Swirl the filling gently with a toothpick.
- Bake for 20-22 minutes or until a toothpick comes out clean from the cake part.
- Cool in pan for 10 minutes before moving to a wire rack.
- Prep Time: 20 minutes
- Cook Time: 22 minutes
- Category: Dessert
- Method: Baking
- Cuisine: American