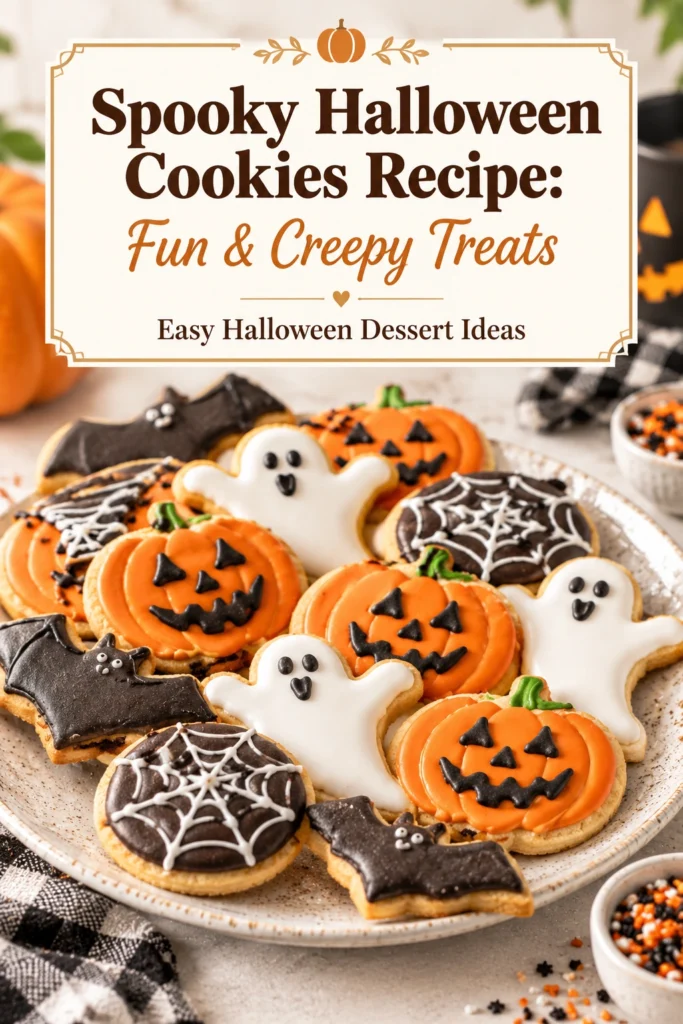
A well-chilled dough is the secret to keeping these cookies from spreading too thin in the oven. This ensures the shapes remain distinct for decorating.
These spooky Halloween cookies are soft, buttery sugar cookies designed to be a canvas for creepy decorations. They provide a balance of sweet flavor and a sturdy texture that holds up to icing.
Home bakers appreciate this recipe because it uses standard pantry staples while delivering a professional look. The result is a treat that looks complex but requires minimal specialized equipment.
What makes these unique is the versatile base, allowing for various themes from ghosts to monsters. You can easily adapt the colors to fit any specific party theme.
Compared to store-bought versions, these cookies lack the artificial aftertaste of preservatives and offer a much softer crumb. The freshness of homemade butter makes a noticeable difference in the aroma.
This recipe is ideal for families who enjoy decorating together or for hosts needing a crowd-pleasing dessert. It turns a baking session into a creative activity for all ages.
The following sections provide the exact steps and tips needed to master these treats.
- ●Why You’ll Love This Recipe
- ●A Brief Background / Why This Recipe Works
- ●Perfect For Spooky Celebrations and Party Platters
- ●Main Ingredient Spotlight: Unsalted Butter
- ●Secondary Ingredient Spotlight: Vanilla Extract
- ●Key Ingredients
- ●How to Make It
- ●Pro Tips
- ●Delicious Variations
- ●Best Ways to Serve
- ●Storage and Leftovers
- ●Frequently Asked Questions
- ●Why This Recipe Belongs in Your Weekly Rotation
- ●Final Thoughts
This recipe focuses on reliability and visual impact, making it a go-to for October festivities.
- ●The dough is easy to handle and does not stick to the hands during shaping.
- ●Standard ingredients make it accessible without a trip to specialty stores.
- ●A soft texture ensures the cookies are enjoyable for children and adults alike.
- ●The baking time is short, allowing for quick batches.
- ●Decorating options are endless, from simple icing to candy additions.
- ●They pair perfectly with other treats like Spooktacular Halloween Rice Crispy Treats Recipe Fun Dessert
- ●The recipe is scalable for large parties or small family gatherings.
- ●Cookies maintain their shape well, which is critical for spooky themes.
- ●Preparation can be done in advance to reduce stress on party day.
These cookies combine a classic flavor profile with the excitement of seasonal decorating.
A Brief Background / Why This Recipe Works |
The success of a decorated cookie relies on the ratio of fat to flour. This specific balance prevents the cookies from becoming too cakey, which would make them difficult to cut into shapes.
Using a higher proportion of butter creates a rich mouthfeel and a slight crispness on the edges. This contrast with the soft center is what defines a high-quality sugar cookie.
The inclusion of a chilling period allows the gluten to relax and the fats to solidify. This prevents the cookies from flattening into puddles, preserving the creepy silhouettes.
These cookies work as a base for many other ideas, such as Creepy Halloween Eyeball Cookies Easy Spooky Dessert Ideas For Parties
Perfect For Spooky Celebrations and Party Platters |
These treats are ideal for themed parties where visual presentation is as important as taste. Their sturdy nature makes them easy to arrange on large platters without breaking.
For those prepping for school events or office parties, these cookies are a practical choice. They travel well in containers and stay fresh for several days.
During the holidays, this recipe serves as a great bridge between traditional baking and creative art. It is an excellent way to engage children in the kitchen during the Halloween season.
Main Ingredient Spotlight: Unsalted Butter |
Unsalted butter provides the foundational richness and flavor of the cookie. It creates a tender crumb flour proteins, which limits gluten development and prevents the cookie from becoming tough.
Secondary Ingredient Spotlight: Vanilla Extract |
Vanilla extract adds a floral sweetness that cuts through the richness of the butter. It enhances the overall flavor profile, ensuring the cookies taste like a classic bakery treat.
Using a high-quality extract results in a more complex aroma. This subtle addition is what makes the simple sugar base feel sophisticated.
Key Ingredients |
Each component plays a specific role in achieving the final texture and flavor.
- ●Unsalted Butter — Provides richness and a tender, melt-in-the-mouth texture.
- ●Granulated Sugar — Adds sweetness and helps the edges brown slightly.
- ●Egg — Acts as a binder and provides structure to the dough.
- ●Vanilla Extract — Delivers a warm, aromatic sweetness.
- ●All-Purpose Flour — Forms the structural base of the cookie.
- ●Baking Powder — Creates a slight lift for a softer bite.
- ●Salt — Balances the sugar and enhances the butter flavor.
- ●Powdered Sugar — Used for the smooth, colorful icing.
How to Make It |
Follow these steps carefully to ensure your cookies maintain their spooky shapes and soft texture.
- Cream the butter and sugar: Beat the softened butter and sugar together until the mixture is pale and fluffy. This process incorporates air, which helps the cookies stay light rather than dense. Avoid over-mixing once the sugar is incorporated to prevent too much air from causing the cookies to collapse.
- Incorporate wet ingredients: Add the egg and vanilla extract, beating until the mixture is smooth and glossy. Ensure the egg is at room temperature so it emulsifies properly with the butter. If the mixture looks curdled, the egg was likely too cold.
- Combine dry ingredients: Sift together the flour, baking powder, and salt in a separate bowl. Sifting removes lumps and ensures the leavening agent is evenly distributed. This prevents uneven rising or pockets of salt in the finished cookies.
- Mix the dough: Gradually add the dry ingredients to the wet mixture on low speed. Mix only until the flour disappears to avoid developing too much gluten. Over-mixing at this stage leads to tough, bread-like cookies.
- Chill the dough: Wrap the dough in plastic and refrigerate for at least one hour. Cold dough is easier to roll and keeps the shapes sharp during baking. Skipping this step usually results in cookies that spread and lose their spooky details.
- Roll and cut: Preheat the oven to 350F and roll the dough on a floured surface to about a quarter-inch thickness. Use cookie cutters to create your spooky shapes. Dust the cutters with flour to prevent the dough from sticking to the metal.
- Bake the cookies: Place shapes on a parchment-lined sheet and bake for 8 to 10 minutes. Remove them when the edges are barely golden but the centers still look soft. Over-baking will make the cookies hard and dry.
- Cool and decorate: Let cookies cool completely on a wire rack before applying icing. Warm cookies will melt the icing, causing the designs to run. Use a piping bag for precise, creepy details.
1These small adjustments can significantly improve the quality and appearance of your treats.
- ●2Room temperature ingredients: Use butter and eggs at room temperature to ensure a smooth emulsion.
- ●3Parchment paper: Always use parchment or silicone mats to prevent sticking and ensure even browning.
- ●4Freeze the cutouts: Place the cut cookies in the freezer for 5 minutes before baking to maximize shape retention.
- ●5Consistency of icing: Add milk or water to your powdered sugar one teaspoon at a time until the icing holds a peak.
- ●6Avoid over-baking: Pull the cookies out while they still look slightly underdone in the center.
Delicious Variations |
You can easily modify this base recipe to create different flavors or dietary options.
- ●Chocolate Base: Replace a small portion of flour with cocoa powder for a dark, gothic look.
- ●Pumpkin Spice: Add a teaspoon of pumpkin pie spice to the dry ingredients for a seasonal twist.
- ●Almond Twist: Substitute vanilla extract with almond extract for a more nutty, sophisticated flavor.
- ●Gluten-Free: Use a high-quality 1:1 gluten-free flour blend for guests with sensitivities.
- ●Citrus Zest: Add lemon or orange zest to the sugar for a bright, refreshing contrast to the sweetness.
These variations allow you to pair these cookies with other treats like Irresistible Halloween Sugar Cookie Bars Recipe Delight Easy Spooky Dessert Ideas
Best Ways to Serve |
Presentation is key for Halloween treats to make them feel like part of the celebration.
- ●Arrange them on a black platter to make the bright colors of the icing pop.
- ●Serve alongside a bowl of warm apple cider or a spiced latte.
- ●Create a “dessert graveyard” cookies upright in a tray of chocolate crumble.
- ●Pair them with Spooky Ghost Brown Butter Pumpkin Cookies Recipe Delight Easy Halloween Treats for a variety of flavors.
For a party setting, individual napkins with spooky prints add a nice touch. Small plates allow guests to enjoy the cookies without the icing smudging.
If serving at a children’s event, consider placing the cookies in small clear bags with a ribbon for a take-home treat.
Storage and Leftovers |
Refrigerating
Store baked and decorated cookies in an airtight container in the refrigerator for up to 5 days. Keep them away from strong-smelling foods to prevent the butter from absorbing odors.
Reheating
These cookies are best enjoyed at room temperature. If they have hardened in the fridge, let them sit out for 30 minutes to regain their soft texture.
Freezing
Freeze unbaked dough balls or baked, undecorated cookies for up to 3 months. Wrap them tightly in plastic wrap and foil to prevent freezer burn.
Frequently Asked Questions |
- ●Q: Why did my cookies spread so much in the oven?A: This usually happens if the butter was too soft when mixing or if the dough was not chilled long enough. Chilling the dough solidifies the fats, which slows down the melting process in the oven and preserves the shape.
- ●Q: How do I stop the icing from bleeding into the cookie?A: Ensure the cookies are completely cool before icing. If the icing is too thin, it will soak into the crumb. Add more powdered sugar to the icing to create a thicker consistency that sits on top of the surface.
- ●Q: Can I use margarine instead of unsalted butter?A: While possible, margarine changes the flavor and texture. Butter provides a specific richness and a cleaner melt. Margarine may result in a greasier cookie and a less traditional sugar cookie taste.
- ●Q: What is the best way to get clean edges with cookie cutters?A: Dip your cookie cutter in flour between every single cut. This prevents the dough from clinging to the edges, allowing the cutter to slide out cleanly without distorting the spooky shape.
- ●Q: Can I bake these cookies in advance?A: Yes, you can bake the cookies and store them in an airtight container for several days. However, it is best to decorate them shortly before serving to ensure the icing looks fresh and vibrant.
- ●Q: My cookies came out too hard; what happened?A: This is typically caused by over-baking or adding too much flour. Be careful to measure flour into the cup rather than packing it down, and remove the cookies as soon as the edges are set.
Why This Recipe Belongs in Your Weekly Rotation |
While these are seasonal treats, the base sugar cookie recipe is a versatile tool for any baker. It can be adapted for birthdays, holidays, or simple weekend snacks decorations.
The reliability of this dough means you can produce consistent results every time. Once you master the chilling and baking timing, you have a foolproof method for any shaped cookie.
Incorporating a baking project like this into your routine encourages creativity and provides a satisfying reward. It is a simple way to bring a bit of themed joy into the kitchen.
Final Thoughts |
These spooky Halloween cookies offer a perfect blend of a classic buttery flavor and creative seasonal fun. chilling and baking guidelines, you can achieve professional results at home.
Whether you are hosting a large party or just treating your family, these cookies are an easy and impressive option. They provide a great way to celebrate the spirit of the season through baking.
Grab your cutters and some colorful icing to start creating your own creepy treats today!
Spooky Halloween Cookies Recipe: Fun & Creepy Treats | Easy Halloween Dessert Ideas
- Total Time: 40 minutes
- Yield: 24 cookies 1x
Description
Soft and buttery sugar cookies designed for Halloween decorating. These treats hold their shape perfectly and provide a delicious base for spooky icing designs.
Ingredients
- 1 cup unsalted butter, softened
- 1 cup granulated sugar
- 1 large egg, room temperature
- 2 teaspoons vanilla extract
- 3 cups all-purpose flour
- 1 teaspoon baking powder
- 1/2 teaspoon salt
- 2 cups powdered sugar (for icing)
- 2–3 tablespoons milk or water (for icing)
- Food coloring (orange, purple, green, black)
Instructions
- Preheat your oven to 350F (175C) and line baking sheets with parchment paper.
- Cream the softened butter and granulated sugar in a large bowl until pale and fluffy.
- Beat in the egg and vanilla extract until the mixture is smooth and glossy.
- In a separate bowl, whisk together flour, baking powder, and salt.
- Gradually add the dry ingredients to the wet ingredients on low speed, mixing until just combined.
- Wrap the dough in plastic wrap and refrigerate for at least 1 hour.
- Roll the chilled dough on a floured surface to 1/4 inch thickness.
- Cut out spooky shapes using cookie cutters and place them on the prepared baking sheets.
- Bake for 8-10 minutes, or until the edges are very lightly golden.
- Transfer cookies to a wire rack to cool completely.
- Mix powdered sugar with milk/water and food coloring until smooth, then pipe designs onto the cooled cookies.
- Prep Time: 30 minutes
- Cook Time: 10 minutes
- Category: Dessert
- Method: Baking
- Cuisine: American