A Sweet Escape in Every Bite |
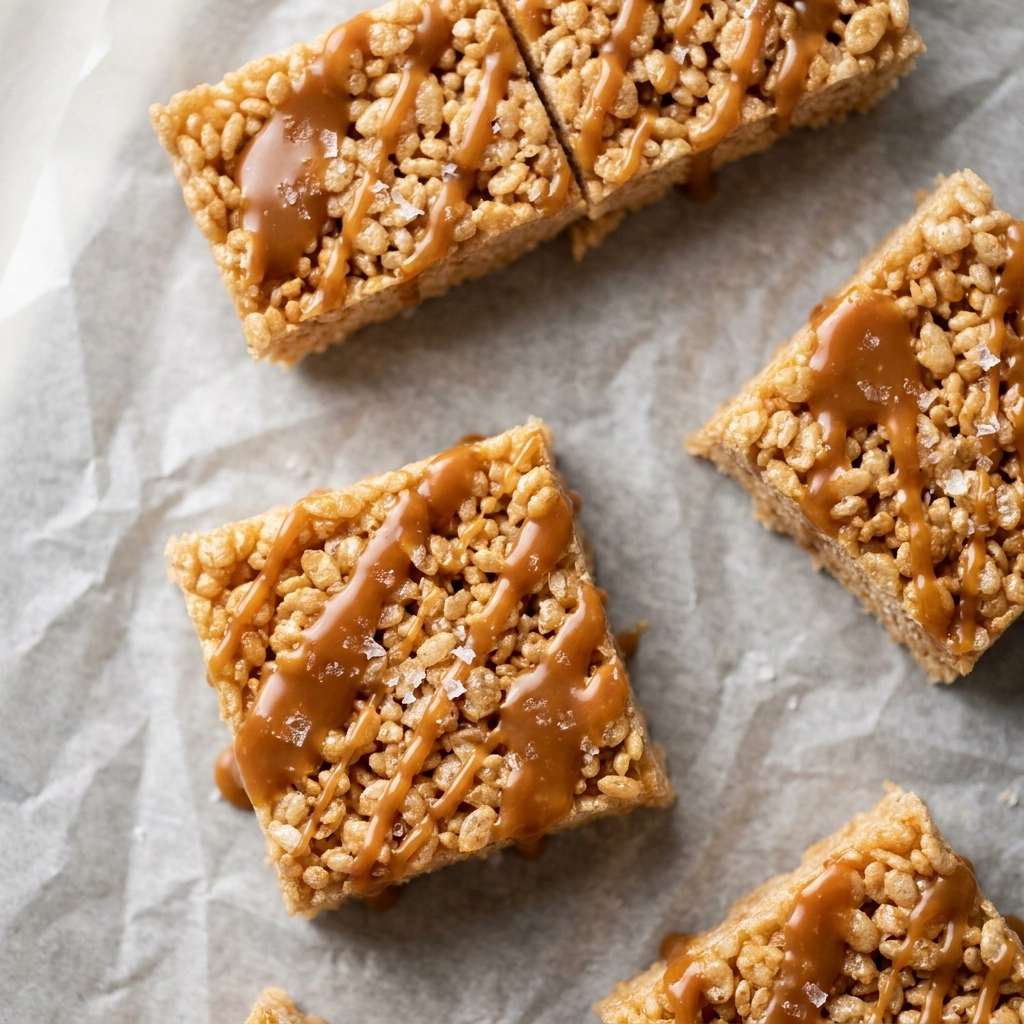
Imagine a rainy Tuesday afternoon in late October, the air turning crisp while a warm glow fills the kitchen. There is something profoundly comforting about the smell of toasted butter and melting sugar wafting through the house, creating a sanctuary of sweetness that invites everyone to slow down and linger.
I almost gave up on this recipe until I realized that the secret wasn’t in the quantity of sugar, but in the patience required to brown the butter. For months, my treats were too soft or lacked that signature depth, but once I mastered the Maillard reaction, everything changed into a gourmet masterpiece.
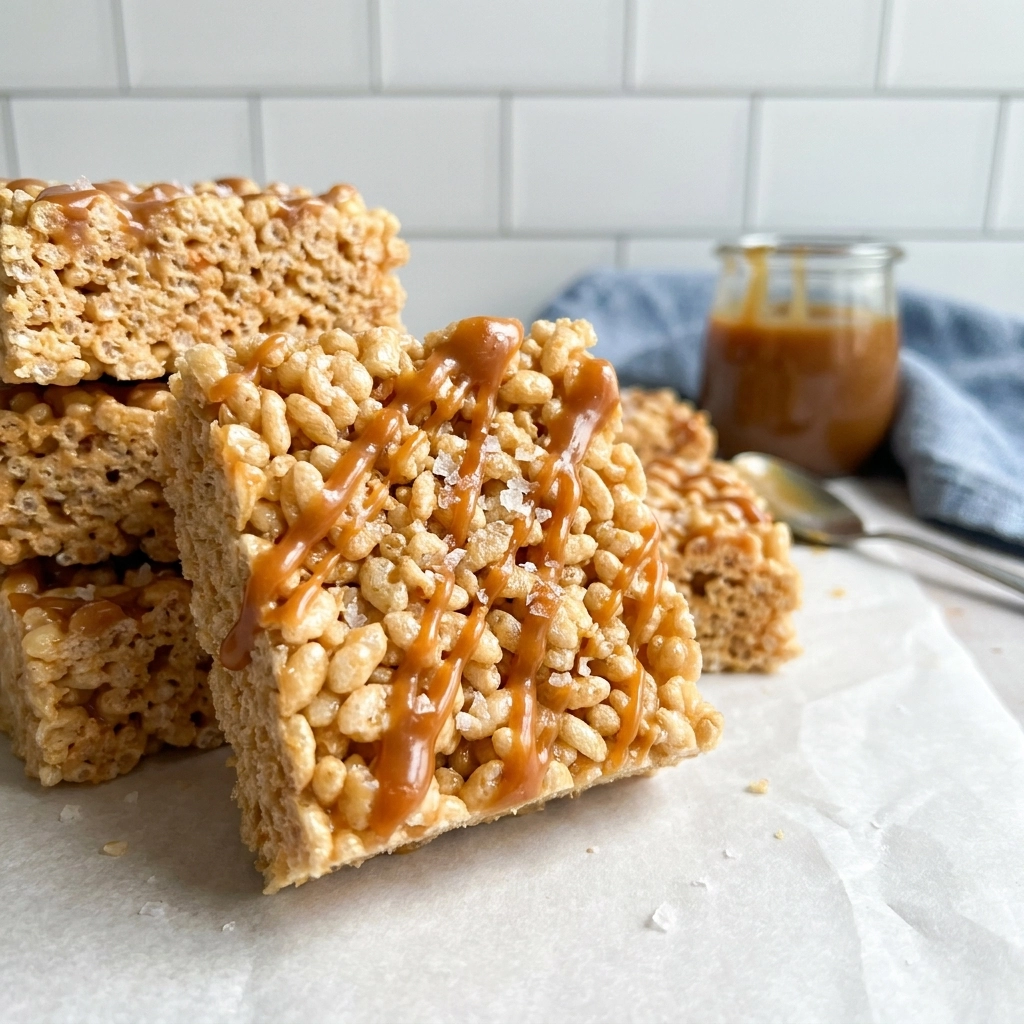
Does anything beat the nostalgic crunch of a marshmallow treat paired with the sophisticated saltiness of caramel? You are absolutely capable of achieving this professional bakery quality in your own home, regardless of your experience level, because we will walk through every bubble and brown hue together.
- ●The brown butter adds a nutty, toasted dimension that removes the “cloying” sweetness of traditional treats.
- ●A perfect balance of flaky sea salt and deep caramel notes creates a complex flavor profile.
- ●The texture is engineered to be chewy without being sticky, thanks to the specific temperature control.
- ●It elevates a simple childhood snack into a sophisticated dessert suitable for dinner parties.
- ●The prep time is minimal, making it an ideal treat for busy parents or students.
Essential Ingredients |
Unsalted Butter provides the fat base, but more importantly, the milk solids in the butter undergo browning to create a nutty, toasted flavor through the Maillard reaction.
Brown Sugar introduces molasses, which provides a deeper, more caramel-like flavor and a chewier consistency than granulated white sugar would allow.
Marshmallows act as the binding agent; the gelatin and sugar structure creates that signature airy stretch and soft chew.
Crisped Rice Cereal offers the essential structural crunch and a neutral toasted grain flavor that balances the richness of the butter and sugar.
Flaky Sea Salt is critical because it cuts through the heavy lipids and sugars, triggering different taste receptors to enhance the overall flavor perception.
Vanilla Extract contains aromatic compounds that bridge the gap between the burnt-sugar notes of the caramel and the creaminess of the butter.
 Let’s Make it Together |
- Brown the butter in a heavy-bottomed saucepan over medium heat, stirring constantly until it smells nutty and turns a deep golden amber. Pro tip: Use a light-colored pan so you can clearly see the color change of the butter solids.
- Stir in the brown sugar and sea salt, whisking continuously for about two minutes to allow the sugars to partially dissolve into the fat.
- Fold in the marshmallows one handful at a time over low heat, stirring gently until the mixture is a smooth, glossy river of gold. Pro tip: Avoid over-stirring at this stage to prevent the marshmallows from breaking down and becoming hard.
- Remove the pan from the heat immediately once the marshmallows are melted to ensure the treats remain soft and chewy.
- Pour in the crisped rice cereal and use a rubber spatula to fold the cereal into the marshmallow mixture until every piece is thoroughly coated. Pro tip: Work quickly but gently to maintain the air bubbles in the cereal.
- Press the mixture into a greased 9×9 inch pan using a piece of parchment paper or a buttered spatula, pressing lightly so the treats aren’t compacted.
- Cool the treats for at least 30 minutes before slicing into squares with a sharp, serrated knife.
Never pack the treats too tightly into the pan or they will become dense and lose their fluffiness.
Avoid using a microwave for the melting process as it creates hot spots that burn the sugar.
Always use a heavy-bottomed pot to ensure even heat distribution and prevent the butter from scorching.
The mixture will be incredibly hot, so be sure to keep children at a safe distance from the stove.
Do not overcook the marshmallows beyond the melting point or the treats will turn rock hard.
Perfecting the Cooking Process |
The magic of this recipe lies in the temperature of the brown butter. You are looking for the butter to reach approximately 250°F (121°C), where the water evaporates and the milk solids toast. If the butter goes beyond this, it will burn and turn bitter, ruining the delicate caramel balance. Patience is key here; the transition from melted butter to browned butter happens quickly, often in a matter of seconds.
Timing the marshmallow integration is equally vital. The goal is to reach a state of “just melted”—where the marshmallows have lost their shape but haven’t yet become a liquid syrup. If you cook them for too long, the sugar recrystallizes upon cooling, leading to a treat that is tough rather than chewy. Have your cereal ready to go the moment the marshmallows are smooth to capture that perfect window of texture.
Why does the order of ingredients matter so much? brown sugar into the brown butter first, you are creating a rudimentary caramel sauce. This ensures that the caramel flavor is deeply embedded in the fat, which then coats the cereal, rather than just having melted marshmallows that taste vaguely of sugar. This layering of flavors is what separates a standard treat from a gourmet one.
Add Your Touch |
For those who crave a bit more texture, try folding in a half-cup of toasted pecans or slivered almonds during the final step. The earthiness of the nuts complements the brown butter beautifully and adds a sophisticated crunch that mirrors a traditional pralines-and-cream candy.
If you want to lean into the “salted” aspect, consider drizzling a thin line of melted dark chocolate over the top and finishing with another pinch of Maldon sea salt. The bitterness of the cacao provides a stunning contrast to the sweet caramel, making these treats feel like a high-end patisserie offering.
Storing & Reheating |
Store these treats in an airtight container at room temperature for up to five days. Avoid the refrigerator, as the cold temperature can cause the sugars to crystallize and the butter to harden, which removes the desired chewiness from the texture.
To revive a treat that has become slightly firm, pop a square into the microwave for exactly 5 to 10 seconds. This briefly remelts the marshmallow and butter, returning the square to its original, gooey state without melting it completely into a puddle.
1Use a rubber spatula instead of a metal spoon to avoid scratching your pan and to fold the cereal more effectively.
2Grease your pan with a neutral oil or butter to ensure the treats slide out without any sticking.
3Sift your sea salt through your fingers to ensure an even distribution of flavor across the batch.
4Wait until the treats are completely cool before cutting to get clean, sharp edges on every square.
5Use a high-quality vanilla bean paste instead of extract for those tiny black specks of luxury.
FAQ |
- ●Q: Can I use salted butter instead of unsalted?
A: While you can use salted butter, it is highly recommended to use unsalted butter so you have total control over the salt levels. Because we add flaky sea salt at the end for a specific flavor profile, using salted butter can make the treats unpredictably salty and may interfere with the caramelization process. - ●Q: Why are my treats too hard and not chewy?
A: This usually happens when the marshmallow mixture is overheated or stirred for too long over the flame. When the sugars are pushed past the melting point, they create a harder structure upon cooling. To avoid this, remove the pan from the heat the very second the marshmallows are smooth. - ●Q: Can I substitute the brown sugar for white sugar?
A: You can, but the flavor and texture will change significantly. Brown sugar contains molasses, which is what provides the deep, rich caramel taste and the moist, chewy texture. White sugar will result in a sweeter, crisper treat that lacks the complex “burnt sugar” notes we are aiming for. - ●Q: How do I know exactly when the butter is “browned”?
A: Watch for the butter to stop bubbling and start foaming. As the milk solids toast, you will see small brown bits forming at the bottom of the pan and the butter will smell like toasted hazelnuts. This transition happens fast, so stay focused and stir constantly.
Brown Butter Salted Caramel Rice Krispie Treats: A Gourmet Twist on a Childhood Classic
- Total Time: 25 minutes
- Yield: 16 squares 1x
Description
A sophisticated upgrade to the classic childhood treat, featuring the deep, nutty flavor of browned butter and the rich sweetness of salted caramel.
Ingredients
- 6 tbsp unsalted butter
- 1/2 cup packed brown sugar
- 1/2 tsp flaky sea salt
- 10 cups crisped rice cereal
- 10 oz marshmallows
- 1 tsp vanilla extract
Instructions
- Brown the butter in a large pot over medium heat until golden brown and nutty.
- Whisk in brown sugar and sea salt for 2 minutes.
- Add marshmallows and vanilla, stirring over low heat until just melted.
- Remove from heat and fold in the crisped rice cereal until coated.
- Press gently into a greased 9×9 inch baking pan.
- Cool for 30 minutes and slice into 16 squares.
- Prep Time: 10 minutes
- Cook Time: 15 minutes
- Category: Dessert
- Method: Stovetop
- Cuisine: American