The sun dips below the horizon, casting long, orange shadows across the porch. Crisp autumn air carries the scent of dried leaves and distant woodsmoke.
This is the hour when the kitchen transforms into a laboratory of festive flavors. It is the perfect moment for a snack that balances whimsy with savory satisfaction.
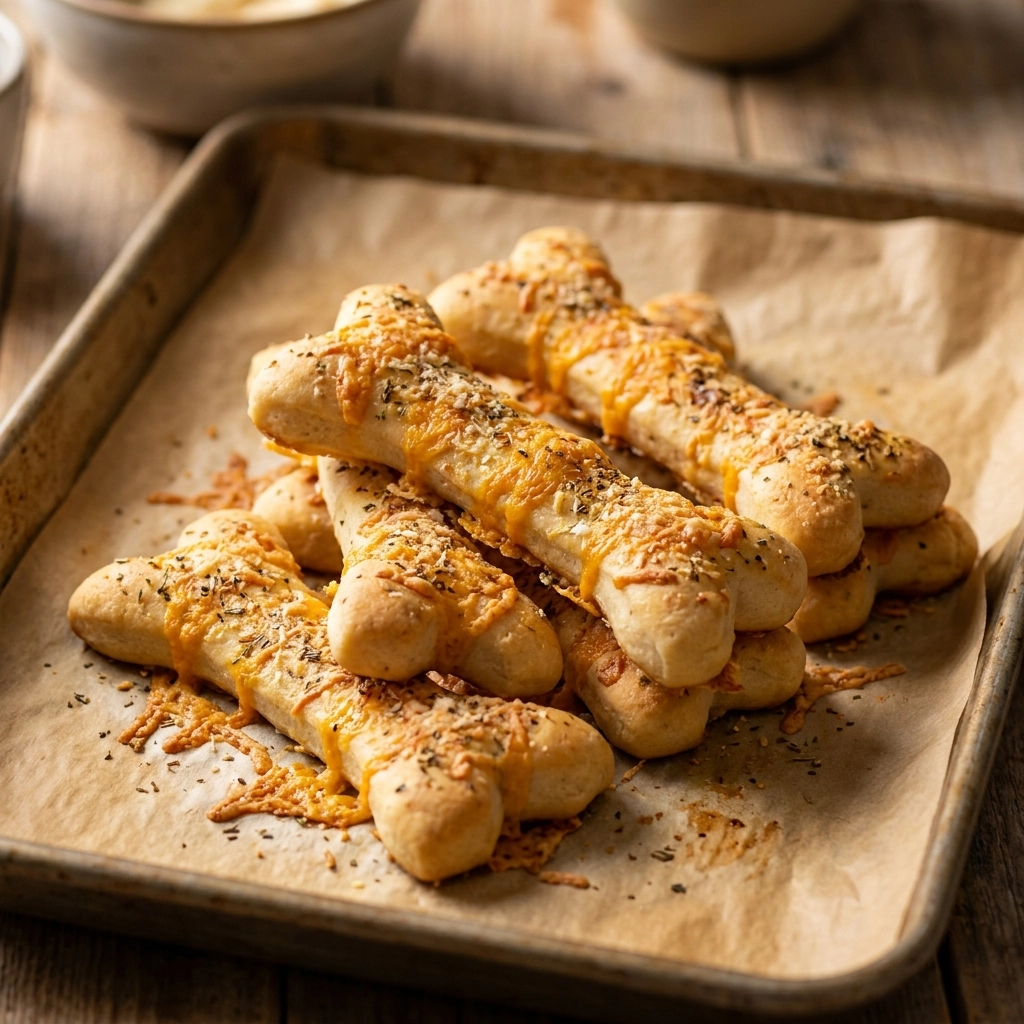
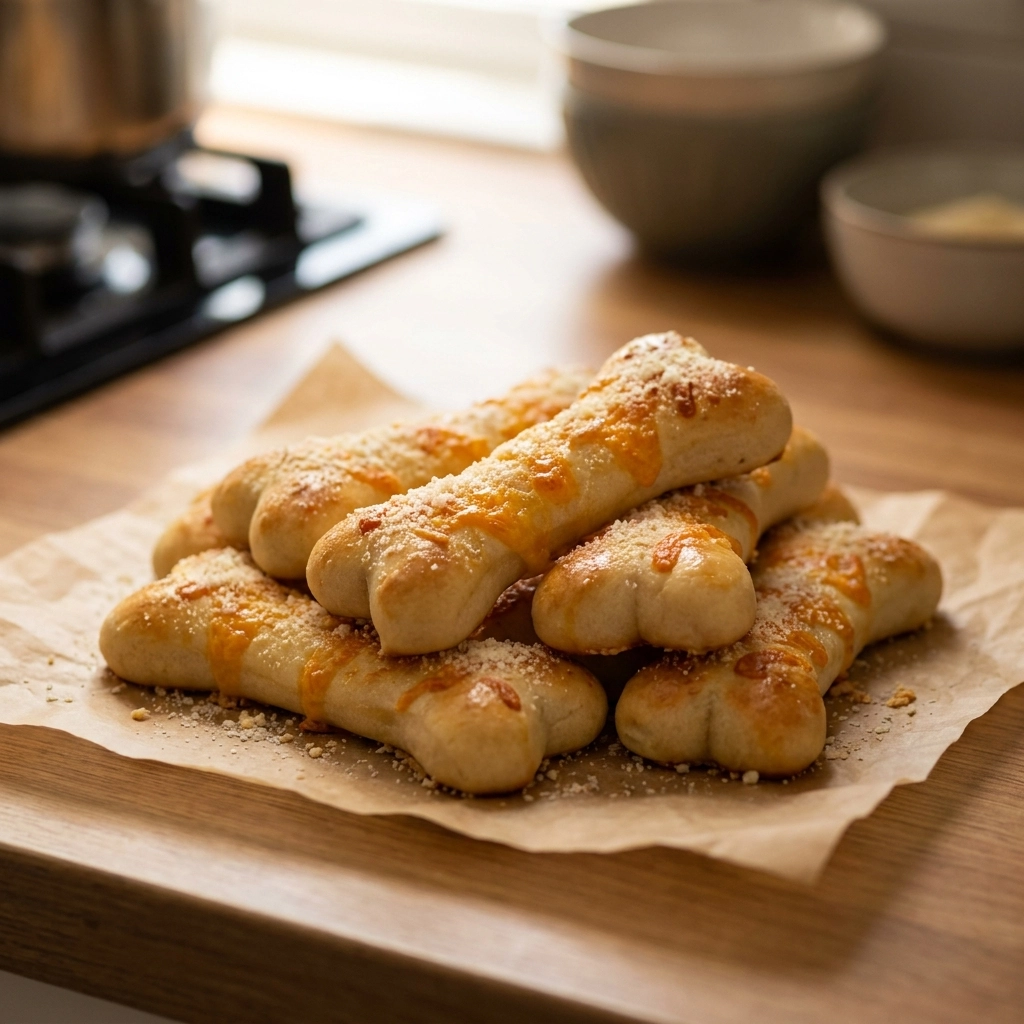
These breadstick bones are a visual delight. They offer a comforting, cheesy center wrapped in a golden-brown crust.
Guests love the interactive nature of pulling these apart. The contrast between the salty cheese and buttery dough creates an addictive experience.
While store-bought frozen breadsticks are convenient, they lack the structural integrity needed for thematic shaping. Home-baked dough allows for the precision required to create realistic bone joints.
This recipe is a triumph for home cooks who want a high-impact look with low-stress preparation. It bridges the gap between gourmet appetizers and playful party food.
Let us explore the technical execution of this spooky treat. For a fresh start to your party, try our Ghostly Ceaser Salad Recipe Spooktacular Halloween Delight
- ●Why You’ll Love This Recipe
- ●A Brief Background / Why This Recipe Works
- ●Perfect For Spooky Halloween Parties and Game Nights
- ●Main Ingredient Spotlight: Pizza Dough
- ●Secondary Ingredient Spotlight: Mozzarella Cheese
- ●Key Ingredients
- ●How to Make It
- ●Pro Tips
- ●Delicious Variations
- ●Best Ways to Serve
- ●Storage and Leftovers
- ●Frequently Asked Questions
- ●Why This Recipe Belongs in Your Weekly Rotation
- ●Final Thoughts
Creating a festive atmosphere requires more than just decorations; it requires food that tells a story. These breadsticks provide a thematic centerpiece that tastes as good as it looks.
- ●Visually striking skeletal shapes that impress guests.
- ●Deeply satisfying combination of melted cheese and garlic.
- ●Minimal active prep time for busy hosts.
- ●Kid-friendly flavors that appeal to all ages.
- ●Customizable flavor profiles using different cheese blends.
- ●Works perfectly as a finger food without needing plates.
- ●Uses accessible ingredients found in any grocery store.
- ●Produces a professional bakery-style golden finish.
- ●Pairs excellently with a variety of red and white dipping sauces.
This dish manages to be both a conversation starter and a comfort food. It simplifies the hosting process while maximizing the aesthetic appeal.
A Brief Background / Why This Recipe Works |
The success of this recipe relies on the Maillard reaction. This chemical process occurs when amino acids and reducing sugars are heated, creating that characteristic brown crust and toasted flavor.
The structure is maintained network in the dough. dough into cylindrical shapes with rounded ends, we mimic the epiphyses of long bones. These ends provide a larger surface area for the cheese to caramelize.
During the development of this recipe, I once let the dough over-proof in a warm kitchen. The resulting bones lost their shape and flattened into puddles of dough. I learned that temperature control is vital for maintaining the skeletal silhouette.
The balance of fat from the butter and protein from the cheese ensures a moist interior. This contrast prevents the breadsticks from becoming too dry during the high-heat bake.
If you are looking for something more decadent, consider the Spooktacular Black Widow Brie Recipe Halloween Delight
Perfect For Spooky Halloween Parties and Game Nights |
These breadsticks are ideal for high-energy social gatherings. Their handheld nature means guests can mingle freely without being tethered to a dining table.
For those planning a themed movie marathon, these serve as the ultimate savory snack. They are hearty enough to satisfy hunger but light enough to keep the mood festive.
Family dinners during the October season benefit from a whimsical side dish. This recipe turns a standard meal into an event for children, encouraging them to engage with the food.
Holiday meal prep is simplified because the dough can be shaped in advance. This allows the host to focus on the guest experience rather than the oven timer.
Main Ingredient Spotlight: Pizza Dough |
Pizza dough serves as the architectural foundation of this dish. The high gluten content provides the elasticity needed to roll the dough into tight, uniform cylinders without tearing.
Its neutral flavor profile acts as a canvas. This allows the garlic and cheese to shine without competition. When baked, the dough expands slightly, creating a soft, airy crumb that contrasts with the crisp exterior.
Secondary Ingredient Spotlight: Mozzarella Cheese |
Mozzarella is chosen for its superior meltability and stretch. The moisture content in mozzarella creates a gooey, stringy effect that is visually appealing when the bones are pulled apart.
Unlike harder cheeses, mozzarella doesn’t separate into oil as quickly under heat. This keeps the breadsticks clean and prevents the dough from becoming greasy.
The mild saltiness complements the butter wash perfectly. It provides a creamy base that carries the pungent notes of garlic across the palate.
Key Ingredients |
Quality components lead to a professional result. Each element here serves a specific functional purpose in the final bake.
- ●Pizza Dough — Provides the necessary structure and chew.
- ●Mozzarella Cheese — Adds the gooey, melted core.
- ●Unsalted Butter — Enhances browning and adds a rich flavor.
- ●Garlic Powder — Infuses the dough with a savory, aromatic punch.
- ●Parsley — Adds a pop of color and a fresh, herbal note.
- ●Parmesan Cheese — Creates a salty, crisp outer crust.
 How to Make It |
Precision in shaping and temperature is the secret to success. Follow these steps to ensure your bones maintain their spooky form.
- Prepare the oven environment: Preheat your oven to 400°F (200°C). High heat is necessary to trigger a rapid rise and immediate browning, which prevents the dough from spreading too much on the pan.
- Prepare the baking surface: Line a large baking sheet with parchment paper or a silicone mat. This prevents the dough from sticking to the metal, ensuring you can remove the bones without distorting their shape.
- Section the dough: Divide the pizza dough into equal portions. I recommend using a scale for consistency so that all bones bake at the same rate, avoiding the tragedy of some being burnt while others remain raw.
- Shape the bone shafts: Roll each portion of dough into a cylinder about 5 to 6 inches long. Ensure the thickness is uniform throughout the middle section to avoid weak points that might snap during handling.
- Form the joint ends: Roll small balls of dough and attach them to both ends of the cylinder. Gently press them into an oval shape to mimic the look of a joint. This is where most of the cheese will concentrate.
- Stuff the core: Carefully create a slit along the length of the bone or wrap the dough around a thick strip of mozzarella. Ensure the cheese is fully encased in dough to prevent it from leaking out and burning on the pan.
- Apply the flavor wash: Melt butter and mix in garlic powder. Brush this mixture generously over the bones; the fat in the butter conducts heat more efficiently, leading to a deeper golden color.
- Add the finishing crust: Sprinkle a blend of grated Parmesan and dried parsley over the top. The Parmesan will dehydrate and crisp up in the oven, adding a layer of texture to the soft dough.
- Execute the bake: Bake for 12 to 15 minutes. Watch for the cheese to bubble and the crust to reach a deep amber hue. Remove them immediately to prevent the bread from becoming overly hard.
For another savory option, check out the Spooktacular Graveyard Taco Dip Recipe For Halloween Fun
1Small adjustments in technique can lead to a significant increase in quality. Use these professional insights to refine your process.
- ●2Chill the dough: If the dough feels too sticky, refrigerate it for 20 minutes before shaping. Cold dough holds its form much better during the initial phase of baking.
- ●3Avoid over-stuffing: Do not fill the dough to capacity with cheese. Over-stuffing leads to “blowouts” where the cheese escapes and burns on the baking sheet.
- ●4Use a rack: Transfer the bones to a wire rack immediately after baking. This allows air to circulate underneath, preventing the bottoms from becoming soggy.
- ●5Fine-grate your cheese: Use a microplane for the Parmesan. Finer particles melt more evenly and create a more consistent crust.
- ●6Room temperature dough: While chilled dough is easier to shape, let the finished bones sit for 5 minutes before baking to ensure the center cooks through.
Delicious Variations |
While the classic garlic-cheese combination is a winner, you can adapt these bones to suit different tastes.
- ●Spicy Bones: Incorporate diced jalapeños or a dash of cayenne into the dough for a kick.
- ●Pesto Twist: Replace the garlic butter with a basil pesto glaze for an Italian-inspired flavor.
- ●Three-Cheese Blend: Use a mix of Mozzarella, Cheddar, and Provolone for a more complex flavor profile.
- ●Everything Bagel Seasoning: Swap the parsley and Parmesan for everything bagel seasoning for an urban brunch vibe.
- ●Vegan Version: Use a plant-based dough and vegan mozzarella alternatives for guests with dietary restrictions.
Experimenting with these variations allows you to tailor the appetizer to your specific crowd. If you need a sweet treat to follow, our Spooktacular Halloween Cauldron Cookie Recipe For Fun Treats is a great choice.
Best Ways to Serve |
Presentation is half the battle when it comes to Halloween food. The way you arrange these bones can enhance the spooky atmosphere.
- ●The Skeleton Platter: Arrange the breadsticks on a black platter to look like a ribcage or a limb.
- ●The Blood Dip: Serve with a side of warm marinara sauce or a spicy red pepper dip to simulate blood.
- ●The Graveyard Display: Place the bones among cauliflower “ghosts” or black olive “spiders” for a full scene.
For a complete menu, serve these alongside a fresh salad. The acidity of the greens cuts through the richness of the cheese.
Ensure the dipping sauces are served in warm bowls. This keeps the cheese in the breadsticks from hardening too quickly as guests eat.
Storage and Leftovers |
Refrigerating
Store leftover bones in an airtight container for up to 3 days. Ensure they are completely cool before sealing to prevent condensation from making the crust soggy.
Reheating
The best method is using an oven or air fryer at 350°F for 5 minutes. This restores the crispiness of the exterior and remelts the interior cheese. Avoid the microwave, as it makes the dough rubbery.
Freezing
Wrap individual bones in foil and place them in a freezer bag for up to one month. Thaw in the refrigerator overnight before reheating in the oven for a fresh-baked taste.
For more festive snacks, try the Spooktacular Halloween Rice Crispy Treats Recipe Fun Dessert
Frequently Asked Questions |
- ●Q: Can I use store-bought canned dough instead of making my own?A: Yes, canned pizza dough or biscuit dough works excellently for this recipe. It provides a consistent rise and is often more forgiving for beginners who are not comfortable working with raw yeast and flour from scratch.
- ●Q: Why did my breadsticks flatten out in the oven?A: This usually happens because the dough was too warm or over-proofed before entering the oven. To prevent this, ensure your oven is fully preheated to 400°F and consider chilling the shaped bones for a few minutes before baking.
- ●Q: What is the best cheese for the center?A: Low-moisture mozzarella is the gold standard because it melts beautifully without releasing too much water. You can blend it with a bit of Gruyere or Monterey Jack for a sharper flavor, provided the cheese remains meltable.
- ●Q: How do I stop the cheese from leaking out?A: The key is to ensure the dough completely seals the cheese on all sides. Pinch the seams tightly and avoid overfilling the bone shaft, leaving a small margin of dough between the cheese and the edge.
- ●Q: Can I make these ahead of time?A: You can shape the bones and keep them on the baking sheet covered with plastic wrap in the fridge for up to 12 hours. Just remember to let them come slightly toward room temperature before baking for the best rise.
Why This Recipe Belongs in Your Weekly Rotation |
While themed for Halloween, the core of this recipe is simply delicious garlic cheese bread. The skeletal shape is a bonus, but the flavor is timeless and universally loved.
It teaches fundamental dough-handling skills that can be applied to many other recipes. Learning how to seal a filling and manage oven temperatures is a valuable asset for any home cook.
The versatility makes it a great option for any gathering, regardless of the holiday. Once you master the bone shape, you can create pretzels, knots, or rolls using the same base logic.
Incorporating a high-quality, home-baked appetizer into your rotation elevates your hosting game. It shows a level of care and creativity that guests always remember and appreciate.
Final Thoughts |
These cheesy breadstick bones combine technical baking principles with a playful, seasonal aesthetic. From the Maillard reaction on the crust to the gooey mozzarella center, every element is designed for maximum impact.
You should make this recipe because it proves that impressive party food does not have to be complicated. It is a low-risk, high-reward dish that brings joy to both the cook and the guests.
Step into your kitchen and bring these spooky skeletal treats to life for your next celebration!
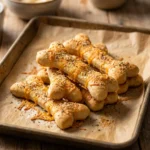
Spooktacular Cheesy Halloween Breadstick Bones Recipe | Easy Halloween Appetizer
- Total Time: 35 minutes
- Yield: 12 bones 1x
Description
Savory, garlic-infused breadsticks shaped like skeletal bones and stuffed with gooey mozzarella cheese. A perfect balance of a crisp exterior and a melted center.
Ingredients
- 1 lb pizza dough (store-bought or homemade)
- 8 oz low-moisture mozzarella cheese, cut into strips
- 4 tbsp unsalted butter, melted
- 1 tsp garlic powder
- 1/4 cup grated Parmesan cheese
- 1 tsp dried parsley
- Pinch of salt
Instructions
- Preheat your oven to 400°F (200°C) and line a baking sheet with parchment paper.
- Divide the pizza dough into 12 equal portions.
- Roll each portion into a cylinder approximately 5-6 inches long.
- Roll smaller balls of dough and attach them to the ends of the cylinders, shaping them into ovals.
- Carefully insert a strip of mozzarella cheese into the center of the dough bone, ensuring the edges are sealed.
- Brush the exterior of each bone with a mixture of melted butter and garlic powder.
- Sprinkle Parmesan cheese and dried parsley over the top of each breadstick.
- Bake for 12-15 minutes or until the crust is golden brown and cheese is bubbling.
- Remove from oven and let cool on a wire rack for 5 minutes before serving.
- Prep Time: 20 minutes
- Cook Time: 15 minutes
- Category: Appetizer
- Method: Baking
- Cuisine: American