October cravings demand something truly haunting.
I remember one chilly October evening when I wanted a dessert that looked like a nightmare but tasted like a dream. That sparked the quest to evolve the classic whoopie pie into something sinister yet sweet.
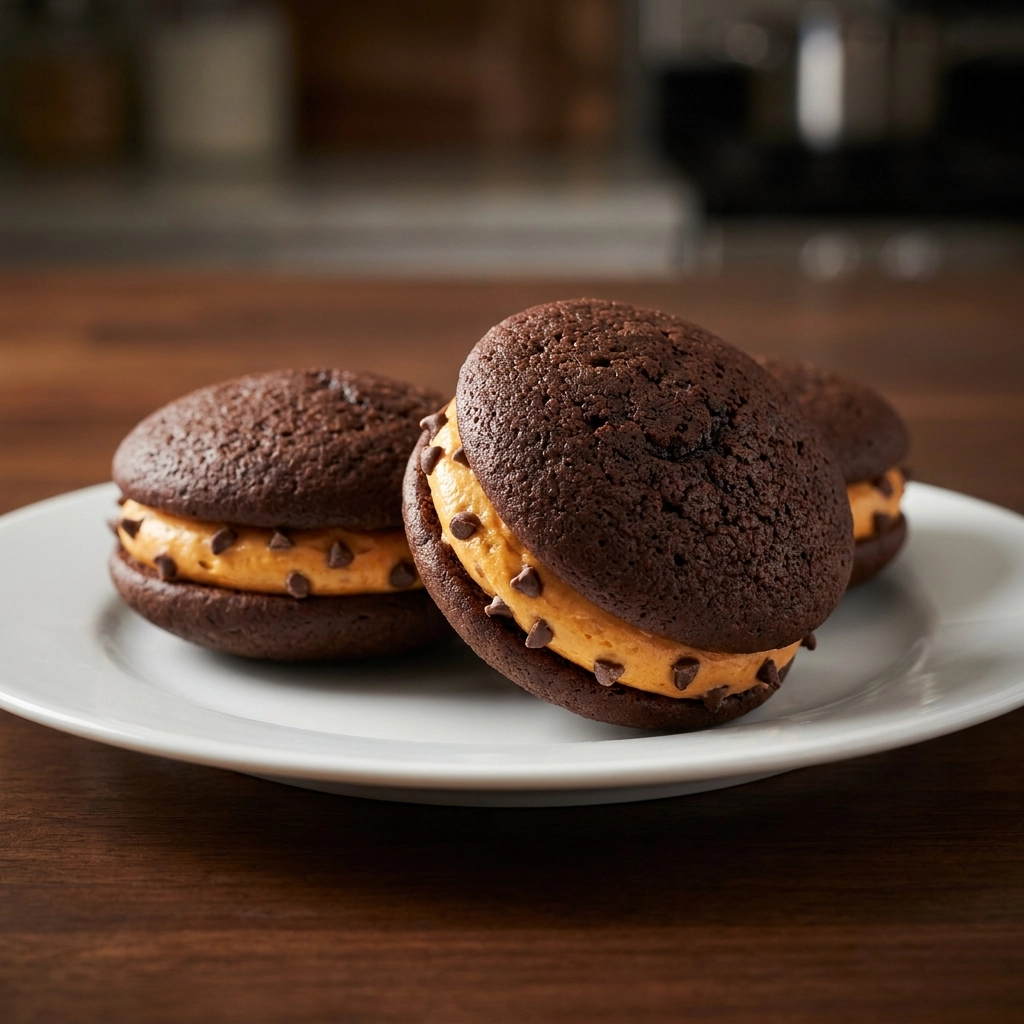
These treats are soft, pillowy cakes sandwiched together with a cloud of velvet frosting. They act as the perfect canvas for ghostly decorations and vibrant colors.
Fans of these pies love the contrast between the dense, moist crumb and the airy sweetness of the filling. It is a sensory experience that feels like a hug from a friendly ghost.
Unlike store-bought versions that often taste like processed sugar, these are rich, buttery, and deeply flavored. The homemade touch ensures they melt in your mouth rather than sticking to the roof.
Whether you are hosting a monster mash or treating your kids after trick-or-treating, this recipe fits the mood. For more savory party ideas, try our Ghostly Ceaser Salad Recipe Spooktacular Halloween Delight
Let’s dive into the magic of the kitchen and conjure up some sweets.
- ●Why You’ll Love This Recipe
- ●A Brief Background / Why This Recipe Works
- ●Perfect For Spooky Parties and Family Traditions
- ●Main Ingredient Spotlight: Cocoa Powder
- ●Secondary Ingredient Spotlight: Cream Cheese
- ●Key Ingredients
- ●How to Make It
- ●Pro Tips
- ●Delicious Variations
- ●Best Ways to Serve
- ●Storage and Leftovers
- ●Frequently Asked Questions
- ●Why This Recipe Belongs in Your Weekly Rotation
- ●Final Thoughts
There is something intrinsically joyful about a dessert that doubles as a decoration. These whoopie pies bring a whimsical energy to the table that standard cupcakes simply cannot match.
- ●The texture is incredibly soft and moist.
- ●They are highly customizable with different food colorings.
- ●The cream cheese filling provides a sophisticated tang.
- ●Kids love helping with the spooky decorations.
- ●They hold their shape well on a dessert platter.
- ●The flavor is rich without being overwhelmingly sweet.
- ●They work perfectly as handheld party appetizers.
- ●The ingredients are mostly pantry staples.
- ●They create a stunning visual impact on a table.
Once you see the look on your guests’ faces, you will realize these are more than just cookies. If you enjoy other chocolatey treats, try our Spooktacular Halloween Brookies A Scrumptious Treat
A Brief Background / Why This Recipe Works |
Whoopie pies trace their roots back to New England and Pennsylvania Dutch traditions, where they were designed as a portable treat for laborers. They sit in that magical middle ground between a cake and a cookie, providing the best of both worlds.
The science behind this recipe relies on the balance of leavening agents and fats. By using a specific ratio of oil and butter, we achieve a crumb that is sturdy enough to hold the filling but soft enough to feel luxurious.
That’s exactly why the addition of a touch of acidity in the cocoa helps bloom the chocolate flavor. This ensures the “dark” theme of the Halloween aesthetic is backed by a deep, resonant taste.
Ultimately, this recipe works because it prioritizes moisture and structure simultaneously.
Perfect For Spooky Parties and Family Traditions |
Planning a themed gathering can be stressful, but these pies make the dessert course effortless. They are easy to plate and transport, making them ideal for school parties or neighborhood potlucks.
Busy weeknights during the Halloween season often leave little time for complex baking. Because the cakes can be baked in advance, you can assemble these with the kids on a Friday night for a bonding experience.
Holidays are about creating memories, and the act of piping “ghosts” or “spiders” onto these pies creates a tradition your children will cherish for years. For an appetizer to start the night, check out our Spooktacular Black Widow Brie Recipe Halloween Delight
Main Ingredient Spotlight: Cocoa Powder |
Cocoa powder is the heart of the spooky aesthetic, providing that deep, midnight hue. It contributes a complex bitterness that cuts through the sugar of the frosting, creating a balanced profile.
The fine texture of high-quality cocoa ensures the cake remains smooth and velvety. Using a Dutch-processed cocoa will give you an even darker color, perfect for a gothic theme.
Secondary Ingredient Spotlight: Cream Cheese |
Cream cheese is the secret weapon in the filling, offering a structural stability that plain buttercream lacks. Its creamy, slightly salty nature prevents the dessert from becoming a sugar bomb.
It adds a rich, mouth-coating quality that complements the cocoa. When whipped properly, it creates a cloud-like texture that feels light despite its richness.
Key Ingredients |
Gather these elements to begin your culinary conjuring. Each plays a vital role in the final hauntingly good result.
- ●All-purpose flour — provides the necessary structure and base for the cake.
- ●Cocoa powder — gives the deep chocolate flavor and dark color.
- ●Granulated sugar — adds sweetness and helps tenderize the crumb.
- ●Baking soda — ensures the cakes rise and stay fluffy.
- ●Eggs — bind the ingredients together and add moisture.
- ●Vegetable oil — keeps the cake moist even when refrigerated.
- ●Cream cheese — the foundation of the tangy, thick filling.
- ●Unsalted butter — adds richness and a smooth finish to the frosting.
- ●Powdered sugar — sweetens the filling and creates a pipeable consistency.
- ●Vanilla extract — enhances all the other flavors in the recipe.
 How to Make It |
Prepare your kitchen for some spooky magic. Follow these steps carefully to ensure your pies are perfectly symmetrical and delicious.
- Whisk the dry ingredients: Sift together the flour, cocoa, sugar, and baking soda in a large bowl. This removes any lumps from the cocoa, which prevents unsightly white streaks in your dark cakes.
- Beat the wet ingredients: Combine the eggs, oil, and vanilla in a separate bowl until the mixture is emulsified and smooth. Pro tip: Use room temperature eggs to ensure the oil incorporates perfectly without separating.
- Fold the mixtures together: Slowly pour the wet ingredients into the dry mixture, stirring gently until just combined. Overmixing at this stage will develop too much gluten, resulting in a tough cake rather than a soft pie.
- Scoop the batter: Drop rounded tablespoons of batter onto lined baking sheets, leaving two inches of space between them. Pro tip: Use a cookie scoop for perfectly uniform sizes, which ensures they all bake at the same rate.
- Bake the rounds: Place them in the oven for 10-12 minutes until the edges are set but the centers remain soft. Once the timer dings, let them cool completely on the pan to avoid tearing.
- Whip the filling: Beat the cream cheese and butter until pale and fluffy, then gradually add powdered sugar and vanilla. Pro tip: Beat the cream cheese first before adding butter to avoid a grainy texture in your frosting.
- Assemble the pies: Pipe a generous swirl of filling onto the flat side of one cake and press another cake on top. Do this gently to avoid squeezing the filling out the sides.
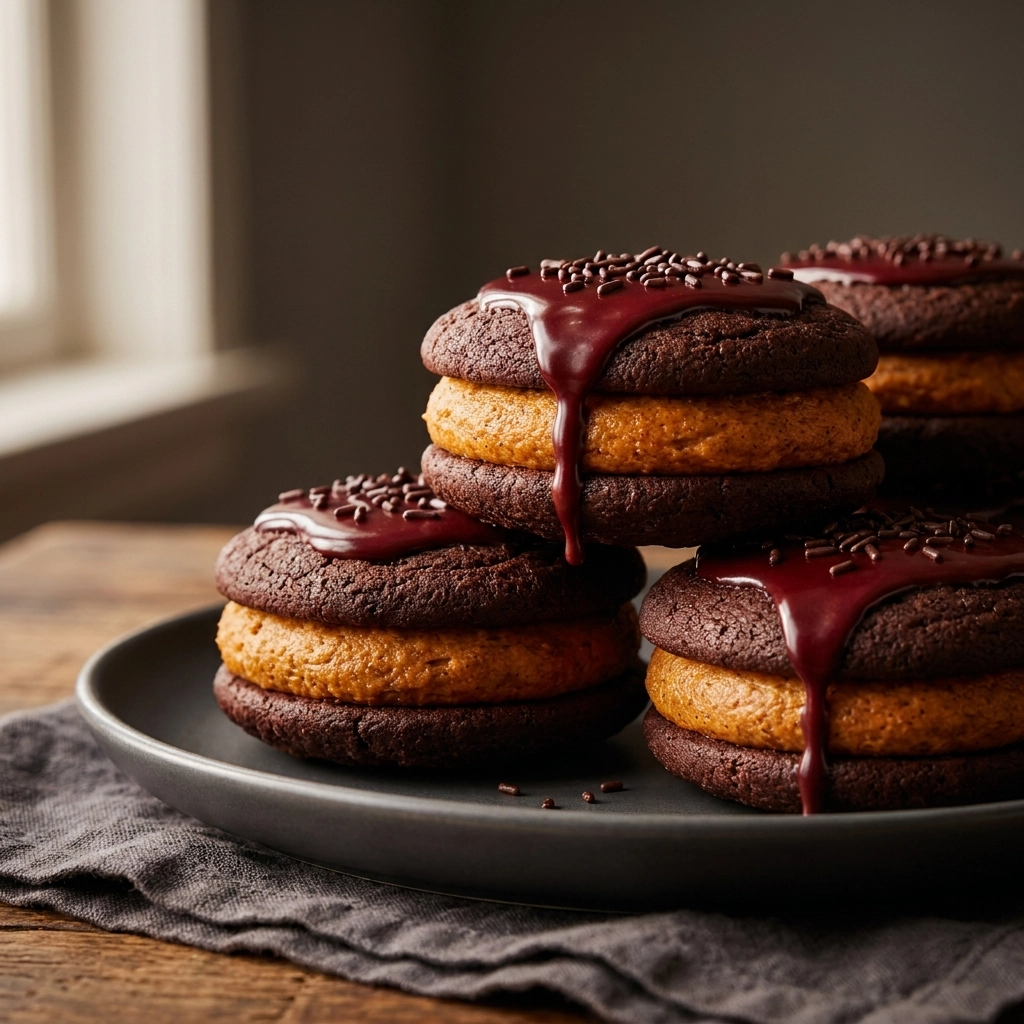
- Decorate the treats: Use melted chocolate or food coloring to draw eyes, webs, or ghosts on the tops. This is where your creativity transforms a simple cake into a Halloween masterpiece.
1Mastering the art of the whoopie pie requires a few insider secrets. These tips will elevate your baking from amateur to professional.
- ●2Room Temperature Everything: Ensure your cream cheese and butter are soft to the touch to avoid lumps in the frosting.
- ●3Avoid Overbaking: Pull the cakes out as soon as the center springs back slightly; overbaked cakes become dry and crumbly.
- ●4The Sifting Secret: Always sift cocoa powder, as it is notorious for clinging together in small, stubborn clumps.
- ●5Chill Before Filling: If your cakes are even slightly warm, the cream cheese filling will melt and slide off.
- ●6Piping Bags: Use a piping bag for the filling to get a professional, clean look that is easier to assemble.
7If you love these detailed tips, you might also enjoy our Indulge In Vampire Fudge Spooky Sweet Halloween Treat
Delicious Variations |
While the chocolate version is a classic, you can easily tweak this recipe to suit different tastes or dietary needs.
- ●Pumpkin Spice: Swap the cocoa for pumpkin puree and cinnamon for a cozy autumn flavor.
- ●Velvet Red: Use red food coloring and a hint of cocoa for a “bloody” Valentine-meets-Halloween look.
- ●Gluten-Free: Replace the all-purpose flour with a high-quality 1:1 gluten-free flour blend.
- ●Vegan Option: Use flax eggs and vegan butter/cream cheese alternatives for a plant-based treat.
- ●Double Chocolate: Fold mini chocolate chips into the cake batter for extra decadence.
Experimenting with colors can turn these into a rainbow of monsters for a children’s party. For another creative sweet, check out Irresistible Sugar Cookie Truffles A Sweet Delight
Best Ways to Serve |
Presentation is everything when it comes to Halloween treats. The goal is to create an atmosphere of playful spookiness.
- ●Arrange them on a black slate platter for a gothic contrast.
- ●Serve alongside a warm apple cider or a cold glass of milk.
- ●Place them in individual cupcake liners to keep fingers clean during parties.
- ●Create a “dessert graveyard” among chocolate “tombstones.”
But here’s the thing: these pies are equally wonderful as a cozy midnight snack during a scary movie marathon. The richness of the chocolate pairs beautifully with a dark roast coffee.
That’s exactly why we recommend serving them slightly chilled to keep the filling firm and the flavors crisp.
Storage and Leftovers |
Refrigerating
Store your assembled whoopie pies in an airtight container in the refrigerator for up to 5 days. Because of the cream cheese in the filling, they must be kept cold to prevent spoilage and maintain the structure of the frosting.
Reheating
These treats are best enjoyed cold or at room temperature. If you prefer them slightly soft, let them sit on the counter for 20 minutes before serving, but never microwave them as the filling will liquefy immediately.
Freezing
You can freeze these for up to 3 months by flashing-freezing them on a tray before transferring them to a freezer bag. Thaw them slowly in the fridge overnight to ensure the moisture redistributes evenly through the cake.
Frequently Asked Questions |
- ●Q: Can I make these without a piping bag?
A: Yes, you can absolutely use a sturdy plastic zip-top bag with the corner snipped off. This works perfectly for dispensing the cream cheese filling in a controlled manner, ensuring your pies look neat and professional. - ●Q: Why did my cakes crack on top while baking?
A: Cracking usually occurs when the oven temperature is too high or the batter is over-beaten. Ensure your oven is properly calibrated and stir the batter only until the flour streaks disappear to maintain a smooth surface. - ●Q: Can I use a different filling instead of cream cheese?
A: While cream cheese is traditional, you can use a thick buttercream or even a peanut butter frosting. Just ensure the filling is firm enough to support the weight of the top cake without oozing out the sides. - ●Q: How do I get the cakes to be perfectly round?
A: The key is using a cookie scoop to drop consistent amounts of batter. If some are oddly shaped, you can use a round biscuit cutter to trim the edges while they are still slightly warm. - ●Q: My filling is too soft to pipe; how do I fix it?
A: If the frosting is runny, it is likely because the butter became too warm. Place the bowl in the fridge for 15-30 minutes, then whip it again with a hand mixer until it regains its stiffness.
Why This Recipe Belongs in Your Weekly Rotation |
Incorporating these treats into your October routine brings a sense of celebration to the mundane. They are a versatile dessert that balances nostalgia with a modern, festive twist.
Moreover, the ability to meal-prep these means you are always ready for an impromptu gathering. Having a batch in the freezer takes the stress out of last-minute hosting.
Whether it is the joy of baking with kids or the satisfaction of a perfectly piped filling, this recipe delivers happiness in every bite. It is the ultimate way to embrace the spirit of the season.
Final Thoughts |
These whoopie pies combine a deep, cocoa-rich cake with a tangy, velvet-smooth filling to create a dessert that is as visually striking as it is delicious.
You should make these because they offer a unique alternative to standard cookies, allowing you to showcase your creativity with spooky decorations while treating your guests to a high-end dessert.
Now, gather your ingredients and bring some delicious magic to your kitchen this Halloween!

Spooktacular Halloween Whoopie Pies: A Sweet Delight
- Total Time: 32 minutes
- Yield: 12 whoopie pies 1x
Description
Soft, cocoa-infused cake rounds filled with a tangy cream cheese frosting and decorated for Halloween.
Ingredients
- 2 cups all-purpose flour
- 3/4 cup cocoa powder
- 1 cup granulated sugar
- 1 tsp baking soda
- 2 large eggs
- 1/2 cup vegetable oil
- 1 tsp vanilla extract
- 8 oz cream cheese, softened
- 1/2 cup unsalted butter, softened
- 3 cups powdered sugar
- 1 tsp vanilla extract (for frosting)
Instructions
- Preheat oven to 350F and line baking sheets with parchment paper.
- Whisk flour, cocoa, sugar, and baking soda in a large bowl.
- Beat eggs, oil, and vanilla in a separate bowl until smooth.
- Fold wet ingredients into dry ingredients until just combined.
- Scoop rounded tablespoons of batter onto sheets and bake for 10-12 minutes.
- Cool cakes completely on the pan.
- Beat cream cheese and butter, then add powdered sugar and vanilla until fluffy.
- Pipe filling onto one cake, top with another, and decorate.
- Prep Time: 20 minutes
- Cook Time: 12 minutes
- Category: Dessert
- Method: Baking
- Cuisine: American