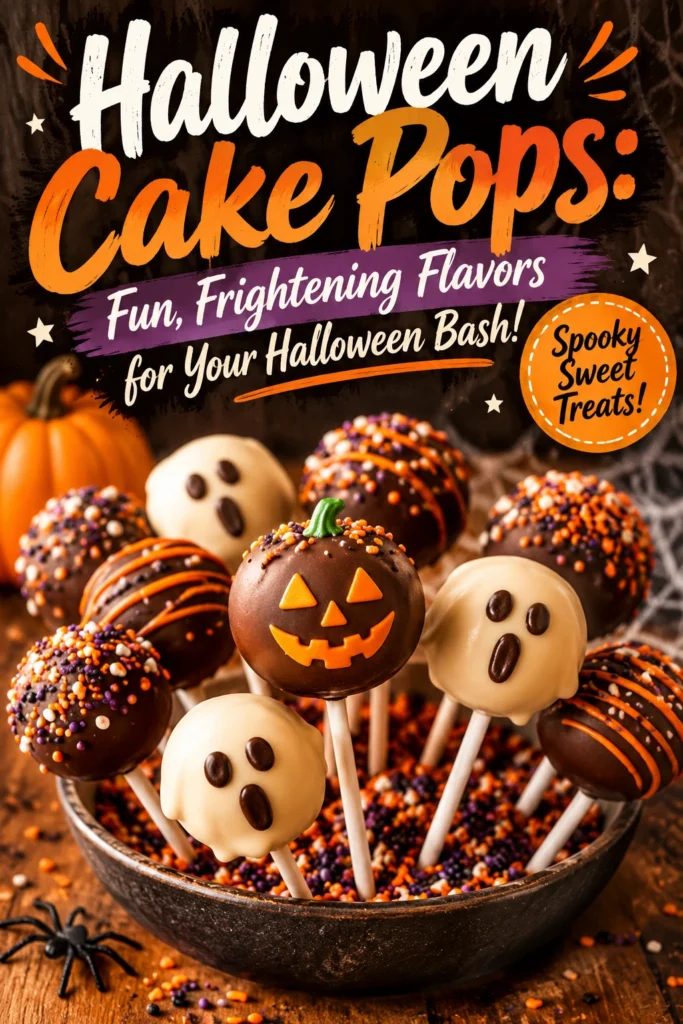
These cake pops offer a dense, fudgy interior that contrasts sharply with a thin, snapping chocolate shell.
The recipe transforms a standard cake into bite-sized spheres coated in colorful candy melts and themed decorations.
Guests typically appreciate the portability of these treats, making them a cleaner alternative to traditional cake slices.
This version stands out by using a higher ratio of frosting to cake, which prevents the pops from drying out during the chilling process.
Store-bought versions often taste waxy or overly sweet, whereas homemade pops allow for a balance of rich cocoa and creamy frosting.
Anyone from a novice baker to a seasoned host can handle these, especially those looking for a family-friendly activity.
Follow the steps below to create a batch of frighteningly delicious treats.
- ●Why You’ll Love This Recipe
- ●A Brief Background on Why This Recipe Works
- ●Perfect For Spooky Parties and Family Traditions
- ●Main Ingredient Spotlight: Candy Melts
- ●Secondary Ingredient Spotlight: Buttercream Frosting
- ●Key Ingredients
- ●How to Make It
- ●Pro Tips
- ●Delicious Variations
- ●Best Ways to Serve
- ●Storage and Leftovers
- ●Frequently Asked Questions
- ●Why This Recipe Belongs in Your Weekly Rotation
- ●Final Thoughts
These cake pops combine the comfort of a baked cake with the novelty of a lollipop, creating a dessert that is as visual as it is tasty.
- ●Bite-sized portions make serving a crowd effortless.
- ●The texture is consistently moist and dense.
- ●Customizable colors allow for endless spooky themes.
- ●They can be prepared a day in advance to reduce party-day stress.
- ●The process of rolling the balls is an engaging activity for children.
- ●Candy melts provide a smoother finish than chopped chocolate.
- ●They pair well with other 25 Spooky Halloween Recipes For Your Next Bash
- ●The chocolate coating seals in moisture, keeping the cake fresh.
- ●They are easy to transport in a container without losing their shape.
Adding these to your dessert table ensures you have a treat that appeals to both kids and adults.
A Brief Background on Why This Recipe Works |
The success of a cake pop depends on the emulsion of cake crumbs and fat. By crumbling a baked cake and folding in frosting, you create a malleable dough that holds its shape without needing flour or additional baking.
The chilling phase is the most critical part of the process. Cold cake balls adhere better to the melted coating, which prevents the pops from sliding off the sticks.
Using candy melts instead of traditional chocolate avoids the need for tempering. These melts are designed to set quickly and maintain a bright, vivid color that doesn’t fade under room temperature lights.
This combination of temperature control and ingredient stability makes the recipe reliable for home kitchens.
Perfect For Spooky Parties and Family Traditions |
These treats are ideal for holiday gatherings where guests are mingling and moving around the room. Because they are on sticks, people can eat them while holding a drink or a plate of appetizers.
For those who enjoy meal prep, the cake can be baked and crumbled days in advance. This allows the host to focus on the decorating process on the actual day of the bash.
They also work well as a companion to more elaborate desserts like a Indulge In Black Velvet Halloween Cake Spooky Delicious or a Delightful Halloween Cookie Cake Spooky Delicious Treats Easy Halloween Dessert
Main Ingredient Spotlight: Candy Melts |
Candy melts are the primary coating and provide the structural integrity of the pop. Unlike real chocolate, they contain stabilizers that prevent blooming—the white streaks that sometimes appear on chocolate—and allow for intense orange, purple, or green hues.
The fast-setting nature of these melts means the decorations, like candy eyes or sprinkles, can be added quickly before the shell hardens. This allows for precise placement of ghostly features.
Secondary Ingredient Spotlight: Buttercream Frosting |
Buttercream acts as the glue that binds the cake crumbs together. It provides the necessary moisture to turn a dry cake into a fudgy center.
The fat content in the frosting also creates a barrier that prevents the cake from absorbing too much moisture from the coating. This keeps the interior light and the exterior crisp.
Key Ingredients |
Quality ingredients are the foundation of a great cake pop. Here is what you will need for the build.
- ●Cake — Provides the base flavor and bulk of the treat.
- ●Buttercream Frosting — Binds the crumbs into a moldable dough.
- ●Candy Melts — Creates the hard, colorful outer shell.
- ●Lollipop Sticks — Provides the handle and allows for easy dipping.
- ●Candy Eyes — Adds the frightening facial expressions.
- ●Orange and Purple Sprinkles — Adds texture and festive color.
How to Make It |
Creating these treats requires a steady hand and a bit of patience during the cooling stages.
- Crumble the cake: Break the cooled cake into a large bowl using your hands or a fork. Ensure there are no large chunks remaining, as lumps will make the balls uneven and prone to cracking.
- Mix in the frosting: Add the buttercream one tablespoon at a time, stirring with a spatula. Stop when the mixture feels like damp sand and holds together when squeezed; adding too much frosting will make the pops too soft to stay on the stick.
- Roll the balls: Scoop about one tablespoon of mixture and roll it between your palms into a smooth sphere. Avoid over-working the dough, which can cause the cake to become greasy from the butter in the frosting.
- Chill the spheres: Place the balls on a parchment-lined tray and freeze for 15 to 20 minutes. They should be firm to the touch but not frozen solid, which ensures the chocolate sticks to the surface.
- Secure the sticks: Dip the tip of a lollipop stick into melted candy coating and insert it halfway into a chilled cake ball. This creates an anchor that prevents the ball from sliding off during the final dip.
- Coat the pops: Submerge the entire ball into the melted coating, lifting it straight up to avoid folds of chocolate at the bottom. Gently tap your wrist to shake off excess coating for a professional, smooth finish.
- Decorate and set: Add candy eyes or sprinkles immediately while the coating is still wet. Set them on parchment paper at room temperature until the shell is completely hard.
1Small adjustments in technique can lead to a much more polished result.
- ●2Avoid overheating the melts: Microwave the candy melts in 30-second intervals, stirring in between. Overheating can cause the sugar to separate, resulting in a grainy texture.
- ●3Use a tall glass for dipping: Pour the melted coating into a narrow, deep glass. This allows you to dip the pops deeper without needing to use as much candy melt.
- ●4Tapping the stick: After dipping, gently tap the stick against the edge of the container. This removes the excess chocolate that usually forms a clump at the base.
- ●5Room temperature frosting: Ensure your buttercream is soft before mixing. Cold frosting creates lumps of fat in the cake mixture that won’t blend in.
- ●6Steady the pops: Use a styrofoam block to stand the pops upright while they dry. This prevents them from leaning or flattening on one side.
Delicious Variations |
While chocolate and vanilla are classics, you can experiment with different flavor profiles to match your theme.
- ●Pumpkin Spice Surprise: Use a pumpkin cake base with a cream cheese frosting center and orange coating.
- ●Midnight Velvet: Use a dark cocoa cake similar to a Indulge In Black Velvet Halloween Cake Spooky Delicious with a deep purple shell.
- ●Apple Cider Crunch: Use an apple spice cake with cinnamon-infused frosting and a white chocolate coating.
- ●Green Monster Lime: Use a vanilla cake with a lime zest frosting and bright neon green melts.
- ●Red Velvet Vampire: Use red velvet cake with a white cream cheese frosting and a blood-red candy shell.
These variations allow you to tailor the sweetness level and flavor to your guests’ preferences.
Best Ways to Serve |
Presentation is everything when it comes to Halloween treats. The goal is to make the dessert table look cohesive and themed.
- ●Themed Platter: Arrange the pops in a circular pattern around a centerpiece like a Black Cat Cake With Halloween Sprinkles Spooky Halloween Dessert Idea
- ●Cake Pop Bouquet: Stick the pops into a foam base covered in black fabric to look like a bouquet of spooky treats.
- ●Individual Wraps: Wrap each pop in clear cellophane with a themed ribbon for party favors.
Serving these alongside a Graveyard Dirt Cake With Halloween Sprinkles Spooky Halloween Dessert Idea creates a visually striking contrast of heights and colors on your table.
If you are hosting a more structured event, consider placing each pop in a small cupcake liner to keep the table clean from any stray sprinkles.
Storage and Leftovers |
Refrigerating
Store finished cake pops in an airtight container in the refrigerator for up to 5 days. Keep them in a single layer to avoid smudging the decorations.
Reheating
Cake pops should not be reheated, as the chocolate shell will melt and the cake may become too soft. Serve them chilled or at room temperature.
Freezing
You can freeze cake pops for up to 3 months. Wrap them individually in plastic wrap before placing them in a freezer bag to prevent ice crystals from forming on the chocolate.
Frequently Asked Questions |
- ●Q: Why do my cake pops keep falling off the sticks?A: This usually happens because the cake balls weren’t chilled long enough or the sticks weren’t anchored. Ensure the balls are firm and always dip the stick in a bit of melted chocolate before inserting it into the cake to act as a glue.
- ●Q: Can I use real chocolate instead of candy melts?A: Yes, but real chocolate requires tempering to stay shiny and snap. If you don’t temper it, the chocolate may bloom or melt quickly at room temperature. Candy melts are recommended for their stability and vibrant colors.
- ●Q: My mixture is too wet to roll into balls. What happened?A: You likely added too much frosting. To fix this, crumble in more cake until the consistency resembles a thick dough. The mixture should be tacky but not sticky enough to cling to your hands excessively.
- ●Q: How do I get a smooth finish without the chocolate clump at the bottom?A: The secret is to lift the pop straight up and gently tap your wrist. If a clump forms, you can carefully trim it with a sharp knife while the chocolate is still slightly soft, or just leave it for a rustic look.
- ●Q: Can I make these vegan or gluten-free?A: Absolutely. Use a gluten-free cake base and a vegan buttercream (made with vegan butter or coconut oil). Ensure your candy melts are dairy-free; many brands offer plant-based versions that behave exactly like the standard melts.
Why This Recipe Belongs in Your Weekly Rotation |
While this is a seasonal favorite, the technique of making cake pops can be adapted for any holiday or celebration. The ability to rescue a cake that didn’t rise perfectly or was slightly overbaked into pops is a valuable kitchen skill.
These treats are a great way to introduce children to baking without the dangers of high-heat ovens during the decorating phase. The versatility in flavor means you can pivot from Halloween spices to spring berries or winter peppermint.
Incorporating these into your repertoire ensures you always have a go-to, crowd-pleasing dessert that looks professional but requires minimal specialized equipment.
Final Thoughts |
These Halloween cake pops combine a rich, moist center with a crisp, colorful shell, making them an ideal addition to any spooky celebration. From the initial crumbling of the cake to the final addition of candy eyes, the process is rewarding and flexible.
Whether you are hosting a massive bash or looking for a small family activity, these treats provide a high visual impact with manageable effort. They offer a creative outlet to experiment with flavors and designs.
Grab your apron and some candy melts to start crafting these frighteningly tasty treats today!
Halloween Cake Pops: Fun, Frightening Flavors for Your Halloween Bash!
- Total Time: 1 hour 15 minutes
- Yield: 24 cake pops 1x
Description
Festive, bite-sized cake pops with a moist interior and a colorful, hard candy shell. Perfectly decorated for Halloween parties.
Ingredients
- 1 baked chocolate or vanilla cake, cooled
- 1/2 cup buttercream frosting
- 12 oz orange or purple candy melts
- 24 lollipop sticks
- 1 package candy eyes
- 1/4 cup Halloween-themed sprinkles
Instructions
- Crumble the cooled cake into a large mixing bowl until no large chunks remain.
- Add buttercream frosting one tablespoon at a time, stirring until a moldable dough forms.
- Roll the mixture into 24 equal-sized spheres using your palms.
- Place spheres on a baking sheet and freeze for 20 minutes until firm.
- Melt candy melts in the microwave in 30-second intervals until smooth.
- Dip the tip of each lollipop stick into the melted chocolate and insert halfway into a cake ball.
- Submerge the entire cake ball into the chocolate, lift straight up, and tap the wrist to remove excess.
- Immediately add candy eyes and sprinkles before the coating hardens.
- Set on parchment paper until completely firm.
- Prep Time: 45 minutes
- Cook Time: 30 minutes
- Category: Dessert
- Method: Baking
- Cuisine: American